A Tantalising Taste of Foil Blocking
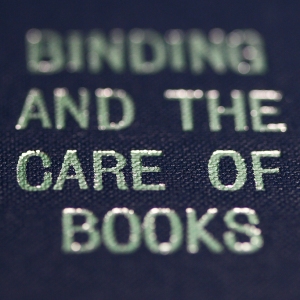
As I may have said before, one of the great things about having a different teacher is that they have different ways of doing things, and it’s great to have one’s eyes and mind opened by them. One of the things we’ve been working on was an adhesive binding of the free ebook Bookbinding and the Care of Books. It’s taken three lessons to bind it, make the case, block the title, and finally case the book in.
Foil Blocking is where the title of the book is impressed into the cover and spine. It is a similar process to letterpress printing but instead of ink, we use foil of various colours and types. In times past actual gold foil was used, but today a plasticky type of foil is the medium of choice.
For this project, the instructor set the type into the chase, using furniture to space the lines, and a quoin to tighten it all together. Don’t you just love the language? A chase is a kind of tray that fits into a blocking press and is used as the carrier for the type. Furniture are spacers of certain thicknesses that are used to evenly set spaces between lines. Finally, a quoin is an ingenious little device that expands and contracts as an inset screw is turned one way or t’other.
I was naïvely hoping to be able to set my own title, but this of course is not practical in a class of 8 novices. After the type was properly set, the instructor set up the blocking press, which had been left to heat up, so that it was all very easy for us novices to put our cases and foil in and pull the lever to leave behind a lovely title in gold or silver foil. The next thing we did was a little surprising: we got some oil from our skin—around the nose or forehead—and rubbed it over the title to get rid of any little bits that were out of place. Who said bookbinders weren’t a weird bunch?
So during the demonstrations and construction, I learnt a few new ways of doing things, and some better practices. One was that when the you’ve made the case, put the text block into it in its proper position, close the case then rub along the hinges with your bone-folder to help set the joint. Once the case dries, it will be easier to case in the text. Another was that it’s OK to use PVA to case the book in. I had always stuck to paste (no pun intended!), just because that’s how I was first taught. One of the main advantages of PVA is that it dries much faster than paste, so once the book has been nipped in the press, it can be opened and inspected. No more waiting overnight for a book to dry, no more getting up in the morning and hurrying into my bindery first thing to see if the book turned out OK. I like that paste is reversible, but I think that it is a bit over-the-top for what I do, at least for the moment.
A Colourful Stab Binding
My first experience of this type of binding was a few years ago now when I made a 10-page A5 journal with A5 card covers and decorative endpapers. A couple of things were different this time around: the cover is a wraparound instead of single sheets of card, the pages are A4 folded in half with the folded edge at the foredge instead of single A5 sheets, and because of its thickness, the holes were drilled on the paper drill, not punched with an awl.
Folding, Bundling, Sewing, Smashing
We were given 10 pages each of 5 different colours, and commenced folding. Once we had folded everything, with all the colours together in separate bundles, we stacked them with pressing boards between each colour, then gave them a half-hour-long squeeze in the nipping press.
Our instructor told us that the process above was referred to as folding and bundling. If the book were to be sewn in sections, it would include the steps of sewing and smashing—smashing referring to knocking out the swell caused by sewing with a hammer. Once again, bookbinding terminology is simply wonderful.
Once we had folded and bundled our pages, we gathered them together into the right order—in this case the order is arbitrary as the pages are blank. After folding the cover, we drilled the holes, and sewed the book together. I enjoyed making this book because it was a bit different to what I had done before.
Madame Guillotine
Last time I posted about my TAFE course, I promised that I would wax lyrical about my experience using TAFE’s electric guillotines. Let me just say that it is amazingly fun, and that my fascination with sharp stuff has reached another high. The mechanical noise that emanates from the machine when you operate the foot pedal to lower the clamp and then when you strike the knife…ah! such unstoppable power. It is also about the accuracy of the machines—down to 1⁄100th of a millimeter. Accuracy is my other vice, although its pursuit does not always result in it! When working with wood—especially when I made my chicken coop—I have learnt to try to not be too accurate, but to lower the standard from 100% to 95%, which still provides an excellent result, but not at the expense of the whole project itself. Often I would try to be so accurate that my inevitable failure would result in me being completely downhearted and not even finishing the project.
…And On
That’s it for another post. This one took me 10 or 11 days to complete. Hopefully my next one will be a bit sooner, but two weeks is fairly OK I think between posts. At TAFE, I continue binding a really thick (23mm) slab of paper in the Japanese style, but this time with a hinged hard cover. Photos to come.


